Years ago, when I was traveling in southern Chile, a local man proudly told me that in Patagonia people can't rely on the sun to dry their laundry, so they use the wind (and plenty of clothespins). Here in the Pacific Northwest, the same principles apply.
At my house, we were finding that even outdoors in the Seattle summer, it could take days for wet neoprene booties to dry out, and ski boots left in the basement to dry in the winter would stay damp much longer than that. The missing element was some way to circulate air all the way to the toe of the boot.
I did a little looking around and noticed that most commercial boot dryers actually seemed to function as boot heaters. That wasn't ideal because we wanted dry footwear, not a warmer set of damp footwear. Going back to the Chilean laundry strategy, I realized that it would be more effective (and energy efficient) to circulate air through each boot, with no heater needed.
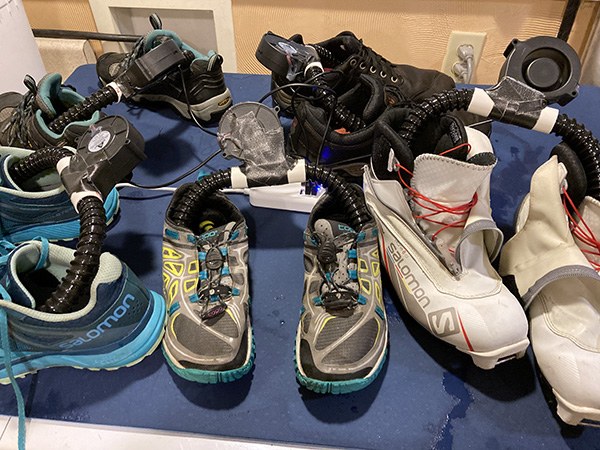
After that realization, it didn't take me long to buy a handful of small fans and build the system that now consistently dries even our wettest footwear, taking only a few hours to overnight. Our system handles five pairs of shoes at a time, but you can easily choose to make a different number of modules depending on your needs. Even better, the whole thing packs down into a stuff sack for storage or travel, so it's easy to deploy in a hotel room or rental cabin, or even in the car between adventures.
Gather your materials
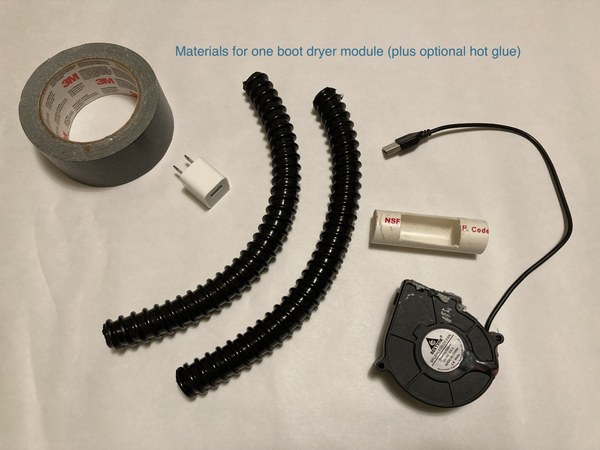
For a dryer module that handles one pair of boots or mittens at a time, you need:
- A 75x30mm USB blower fan (available online for about $5)
- A short piece of 1" thin wall PVC pipe
- Two, 1-foot or longer, pieces of hose (such as 3/4 inch corrugated plastic pond tubing, about $1 a foot)
- Duct tape and/or hot glue
- A USB wall charger
For a family-sized boot dryer system, buy multiples of the above and get one 4- or 6-outlet USB charger.
When I built this, the total cost was around $10 for the individual version or about $50 for our family-sized system (5 modules).
How to build your dryer
Step 1
Using a dremel or a hand saw, cut a rectangle our of your PVC pipe to match the opening in the fan housing. 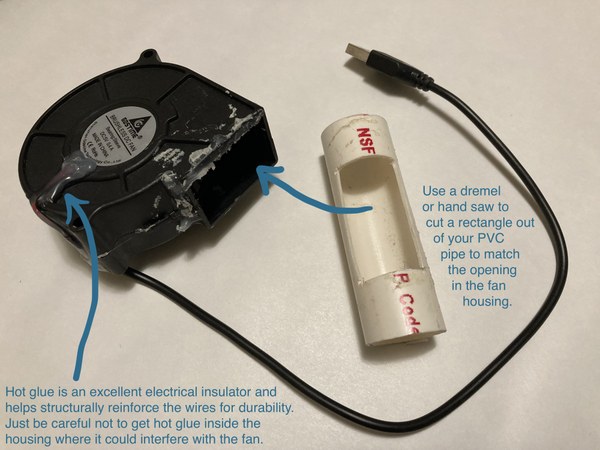
Step 2
Align the opening in the PVC pipe with the fan outlet and secure with duct tape. 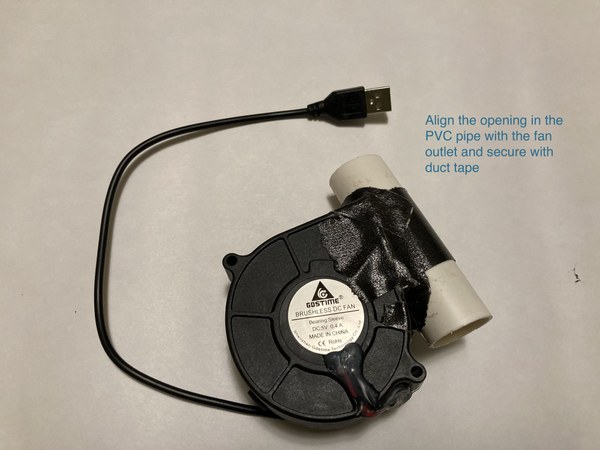
Step 3
Insert hoses into the PVS pipe ends and add a USB wall plug. One boot dryer is complete!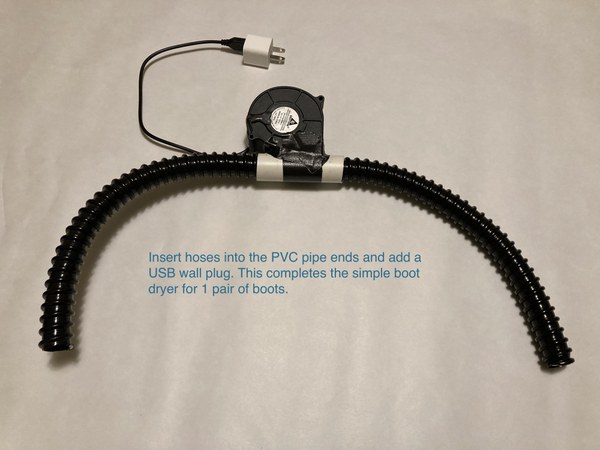
Step 4
Repeat steps 1-3 to build as many boot dryers as you'd like to dry gear for the entire family. 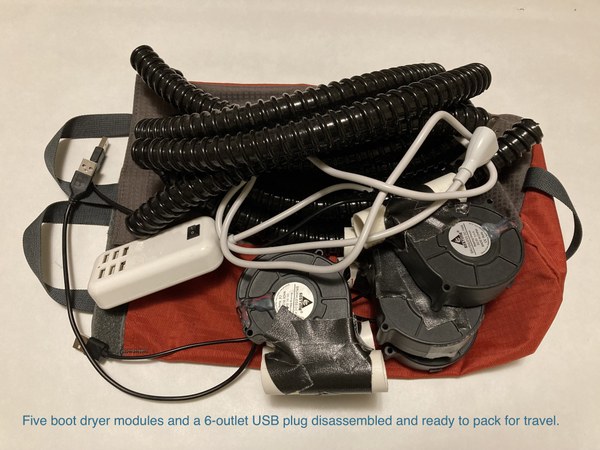
Do you have a favorite DIY project you'd like to share with The Mountaineers community? Send us your ideas at info@mountaineers.org for a chance to get featured on our blog.
Lead image of the DIY boot dryer in use. all photos by Esther Andrews.
Add a comment
Log in to add comments.I love this DIY option! Thanks for sharing. I hope to see more DIY ideas.
This is awesome Esther! I've already shared with another "wet shoed" family and will be making this.
 Esther Andrews
