
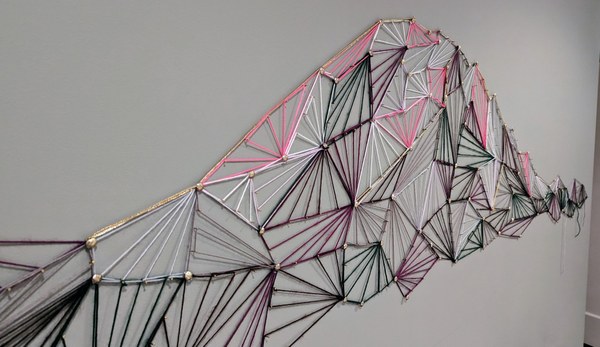
In the summer 2023 Mountaineer magazine, we shared an article on how to liven up your indoor space with a DIY mountain mural. A reader responded with their own version of indoor mountain art: a string art installation of Mt. Tahoma (also known as Mt. Rainier). Read along for some top tips on their artistic process.
"I had recently finished The Artist's Way and was feeling particularly creative. I am drawn to media that is more friendly to those of us who may have big creative ideas but perhaps are less skilled in the actual execution... Our rental apartment at the time had huge walls. I thought string art would be a lot cheaper than buying large-format pieces, and certainly more fun."
With fall officially here, now is the perfect time to cozy up and dive into a crafty project. Thanks to Megan, now any home can have a view of Mt. Tahoma.
Benefits of a String Art Installation
- Cheap large-format art: My apartment had huge, oddly-shaped walls that would have been very expensive to decorate with typically 2D prints.
- Accessible to all skill levels: Don’t consider yourself an artist? No problem! Mixed media like string is easy and doesn’t require you to be able to draw straight lines.
- Earthquake-friendly: I wanted something to decorate the wall above my bed, but without something heavy that might fall and shatter during the inevitable Big One.
- No clean-up: No spilled paint or dirty brushes to clean up at the end. You can work on this project in chunks as you have time, no need to complete it in one go.
Process
- Identify your wall: String art is great for large empty walls!
- Identify your mountain (or mountain range): It can be real or imaginary. Consider the aspect ratio of your canvas. For example, a range would work well for a long hallway, whereas a single peak or two may be better for a canvas with similar length and width.
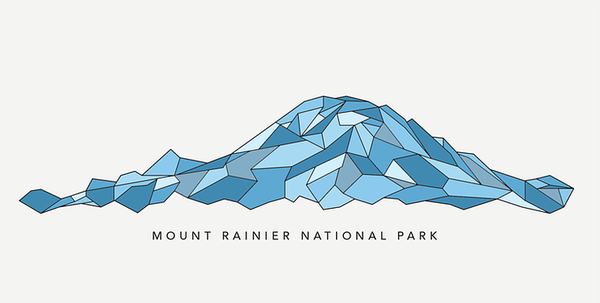
- Select an image: Find an image of your mountain that will serve as your outline. Choose a relatively simple image that shows the major contours of the mountain. Ideally, find an image that’s already polygonized (like this one of Mt. Tahoma). While you’re looking for images, take note of how the mountain appears at different times of day across its faces, peaks, and valleys. This will help when you are tying the string.
- Scale up your image: Identify software that will allow you to scale your image and print it across multiple pages (I used Microsoft Excel. Alternatively, you could use a projector if you have one handy - it will be much easier than printing!). Measure the length of the wall you want to cover, then scale your image to be that length. Confirm that the resulting height of the scaled image still fits your canvas. Note that the center of the peak might not be the center of the image. If that's the case, plan to mount the peak either off-center or centered (and then adjust the edges on the fly as you are hanging the string). I recommend keeping the image dimensions natural, although you could stretch the image to better fill out your canvas if you’d prefer.
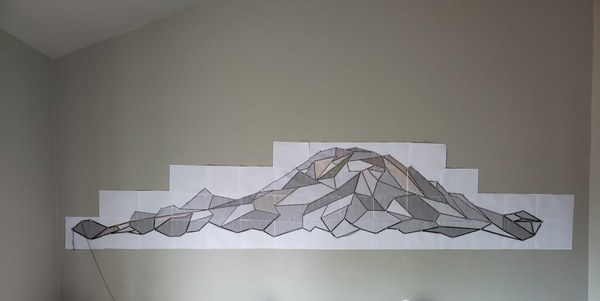
- Print and hang your image: Print the pages, keeping them in order so that you can tile them across your canvas. If you have a particular peak that you want centered on your canvas, use a pencil to mark the center of your wall and hang the column of pages with that central peak at that location. Tape one page at a time, with each page taped to the wall (rather than to the other pages). Now is the time to move the entire peak up or down on your wall. Once you confirm the height on your canvas, use a level to draw a line across the bottom of your canvas. Hang the remaining pages using that line to ensure the entire image is level.
- Procure string, tacks, and nails: Select a handful of colors, including dark colors for the forest/shaded valleys and light colors for the snow/sun-soaked faces. Pick up ~100-200 upholstery tacks for the junctions (like these) and small-head nails for what will be the fanned out pieces along the polygon edges. I chose about 8 string colors in total, 4 dark and 4 light, plus a gold accent string/ribbon for the ridgelines and bright brass metal for both the tacks and nails.
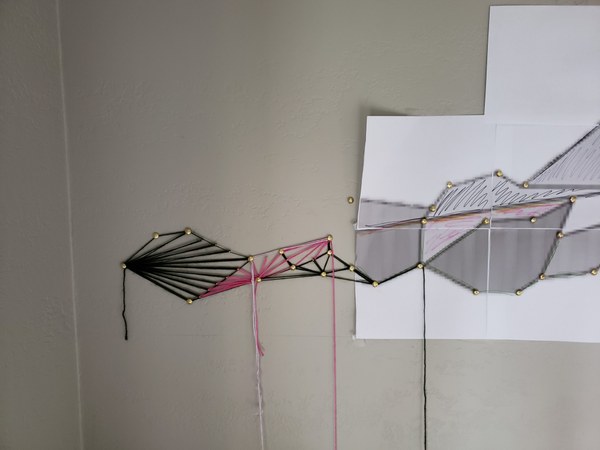
- Mount tacks and string one polygon: Mount the tacks at all junctions using a hammer. Working one polygon at a time, select an edge for the fan. Tie the string to one of the junction tacks, then wrap the string around the junction tacks to make a line along that edge. Hammer about 4-8 nails, evenly spaced, along that line. Then wrap the string from one junction tack (across from the fan edge) to each nail along the fan edge until the polygon is completely enclosed. Tie off that polygon at one of the junction tacks.
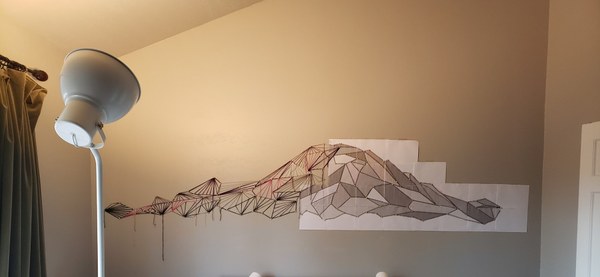
- Keep stringing, removing background paper as you go: As you complete one page’s worth of polygons, tear away the background page. Keep going until all polygons are strung, alternating colors to match snow/trees/valleys/sun-lit faces.
- Finishing touches: If you picked up an accent string, apply it at the very end so that it stands out on top of the other string. Cut away the extra string (or perhaps leave a few to show the maker’s touch!).
Tips for success
- Identify the software to scale your image and print it out first: Before spending the time to find images you like and gather supplies, make sure you have access to software that allows you to blow up images and print them out across multiple pages.
- Pick a good image and center it properly: Once you’ve started stringing, it’s not possible to change the image or its location unless you start over, so make sure you like it before you start with the string.
- Take your time: Depending on the size of your installation, this project will take time. Mine took about 10 hours of stringing after I had the image hung and my supplies ready. With string, you can take a break any time. Enjoy the process!
 Megan Brewster