Trip Report
Intermediate Alpine Climb - Sherpa Peak/West Ridge
Crampons and ice ax not necessary as of July 1, 2021 60m rope, singles of cams .3-3 (3 optional but nice to have), set of nuts Crux takes #2 and/or #3 cams
- Thu, Jul 1, 2021 — Sat, Jul 3, 2021
- Intermediate Alpine Climb - Sherpa Peak/West Ridge
- Sherpa Peak/West Ridge
- Climbing
- Successful
- Road suitable for all vehicles
Approach to low camp
A couple of blow downs in the first half mile from trailhead, from there to Long’s pass is clear (2,000’ elevation gain). Descending Long’s pass is initially a scramble with steep loose dirt, converging on a more established trail. One small, avoidable, and quickly melting snow patch. About half way down to the valley you cross the path of what must have been part of the historic avalanche cycle this winter. There is no obvious trail for a few hundred yards as you navigate downed trees, and there’s even still some snow beneath the debris.
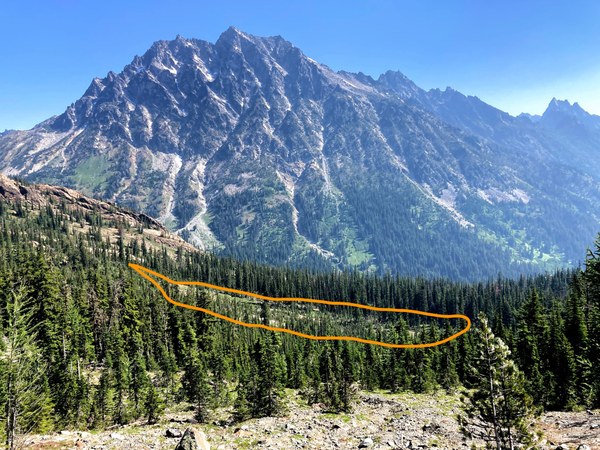
Trail crosses avalanche path (circled) while descending from Long’s Pass
Trail descends 1,300’ to a log crossing, after which you turn right on Ingalls Creek Trail and descend another 200 downstream. At the intersection with the Beverly Turnpike Trail from right, turn left and travel up a meadow.
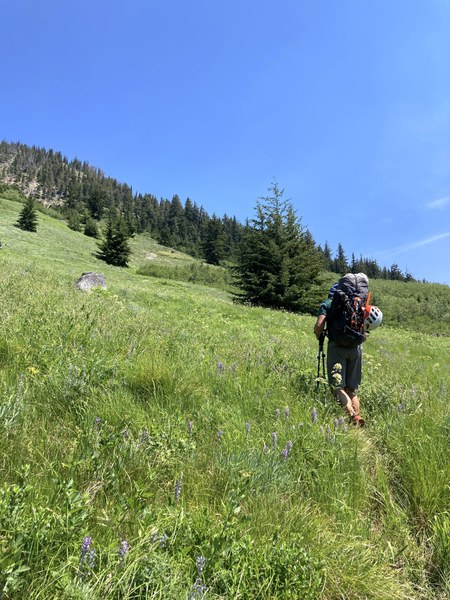
Starting up the meadow
Trail can be difficult to follow through the meadow, after a ~200’ of elevation gain bear left into the trees to pick up a more established trail. At ~5,800’ you turn right to cross the stream and begin to traverse into the next drainage to the east. There is no trail to speak of and many variations are possible as you try to avoid cliff bands and brush - I am not convinced there is any best way through this section. Once in the next catchment ascend to waterfalls for low camp at 6,400’. With some rock relocation, there was room for a two person tent and a couple bivvies.
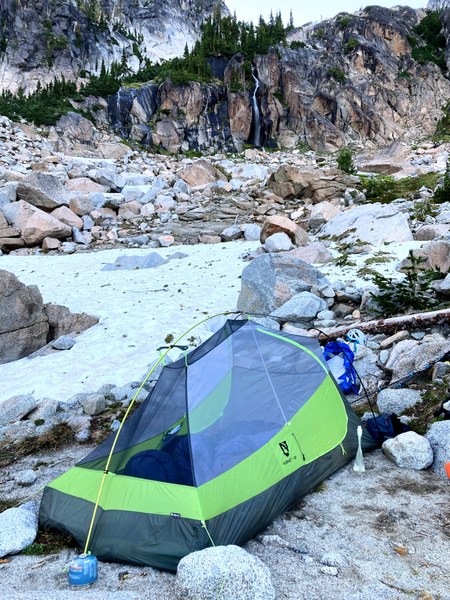
Low camp with waterfalls
Low camp to notch
Begin by ascending to the left of the waterfalls, continuing up the drainage and eventually trending right. There was running water at 7,400’ in a gap in the boulder fields, or snow to melt at high camp. Unsure how long this will last though.
Continue to 8,300’ to the notch at the base of climb (2,100’ elevation gain from low camp). All snow was avoidable (leave the ice ax and crampons at home).
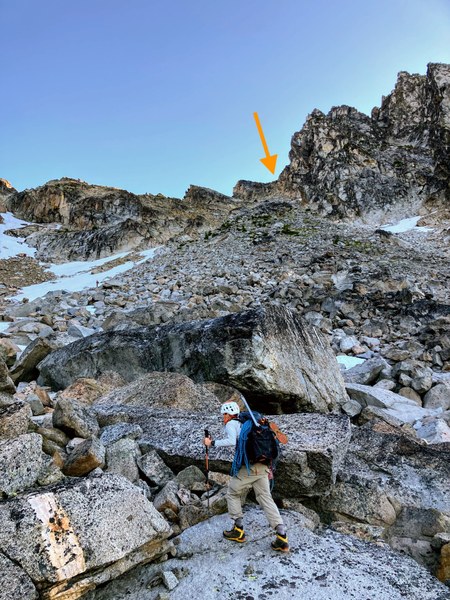
Ascending to the notch at the base of the climb (marked)
The last fifty vertical feet to the notch are a steep scramble, there is a rap station at the top for anyone who doesn’t wish to scramble back down at the end of the climb.
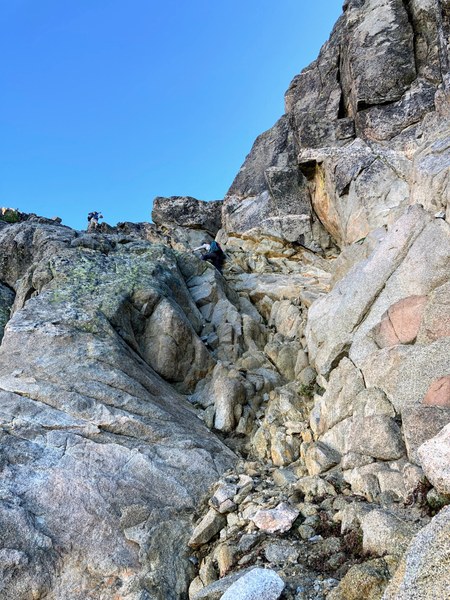
Final scramble to base of climb
Pitch 1 - Class 4
Follow class four ramp up and to the left. This is a short pitch (<30m) ending at one of two rap stations (lower option is climber’s left, easier to see once you are above it, or slightly higher option climber’s right).
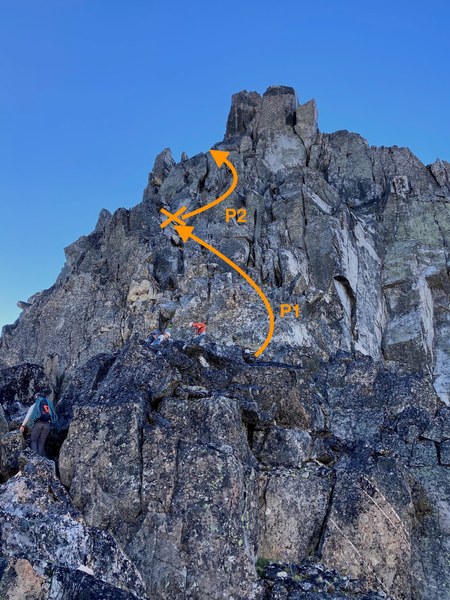
Arriving at the base of the climb, P1 and P2 visible
Pitch 2 - Low Fifth
Begin by ascending climber’s right, then heading left. Another short pitch (~30m) ends at the next rap station.
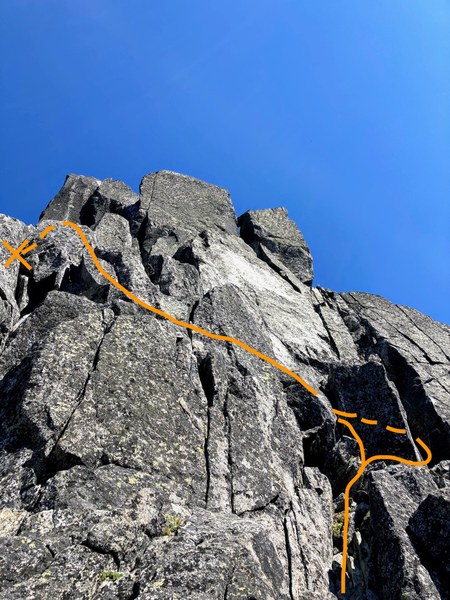
A view of P2 from base
Pitch 3 - Low fifth or 5.7
You may notice a handline attached to the anchor at the base of this pitch, which goes left into the undesirable gully. This is to aid in the optional end of R3 (see rappel description), if no cord is present and you intend to take that rappel option, you may wish to add some before starting the pitch.
You can take either the obvious 5.7 crack or low fifth class to the right.
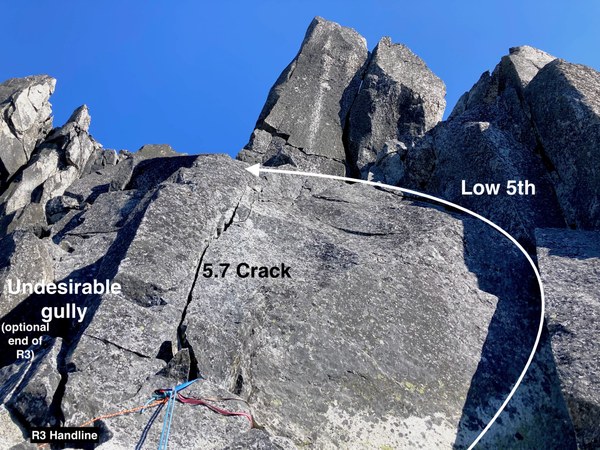
Start of P3
Once at the top of this feature, you will descend towards a notch on climber’s left (right in below photo, taken from higher on the route looking back and down)
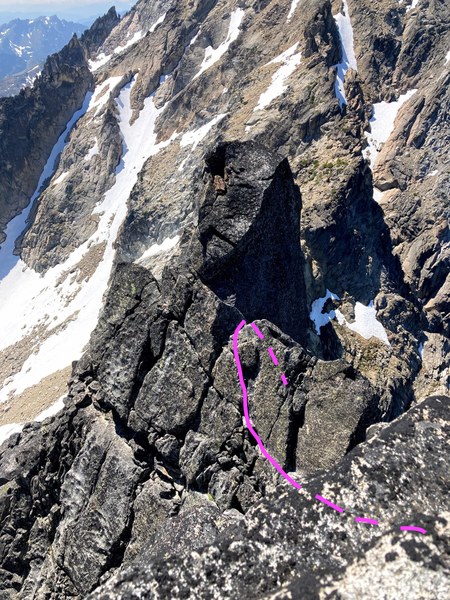
Looking back and down at where P3 descends to the notch
From the notch, start on the ridge going up and then to the right ~20 feet until a good place to build a gear anchor.
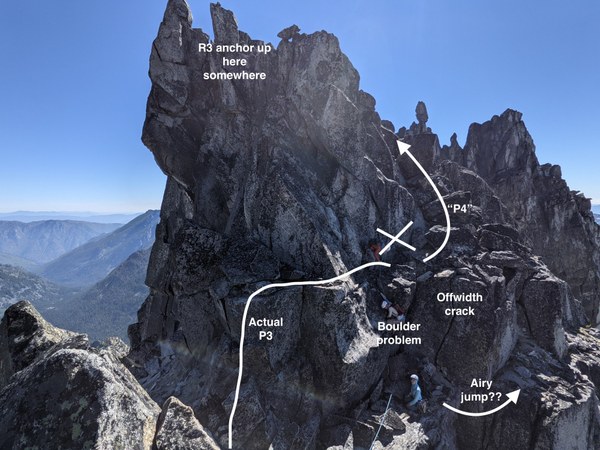
View of the end of P3, taken before descending to the notch. We gave ourselves a few bonus challenges
“Pitch 4” - scramble
From the gear anchor, untie and coil rope. Before beginning to scramble, you may wish to look at the top of the finger for the rap station you will use on the way down. While other route descriptions suggest setting up your next anchor before the gully that comes in from the right, we found the scrambling easy enough to set our belay at the base of P5. While not pictured below, this is the section with large sandy benches.
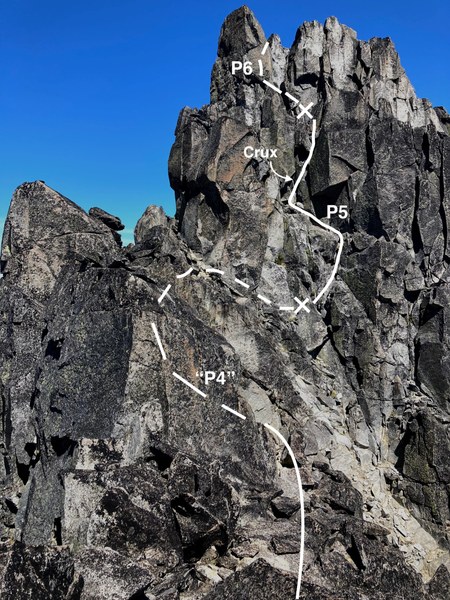
A very rough sketch of the scramble route, which ends at a large flake just past the gully coming in from the right. P5 and P6 also visible
Pitch 5 - “5.4”
Belay off a pinch between a huge flake and the wall. Begin up broken low fifth to right, then swing left under a large overhanging square block.
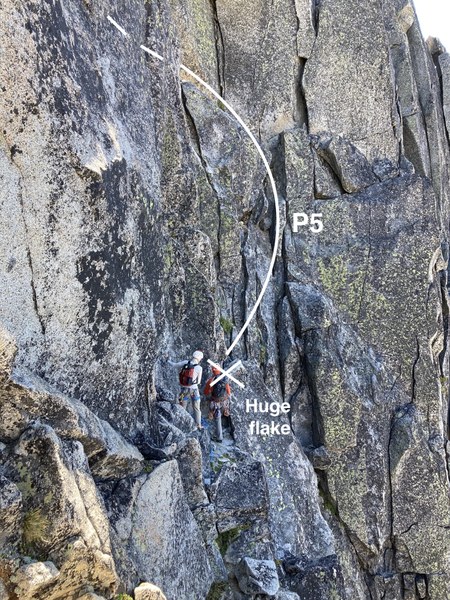
Closer view of belay location off huge flake and start of P5
At the crux, step up using features near ground, then bear hug the two cracks before moving right once high enough. This is the “5.4” move, though our party felt it was more like 5.6-5.7. Cracks on left take #2 and #3
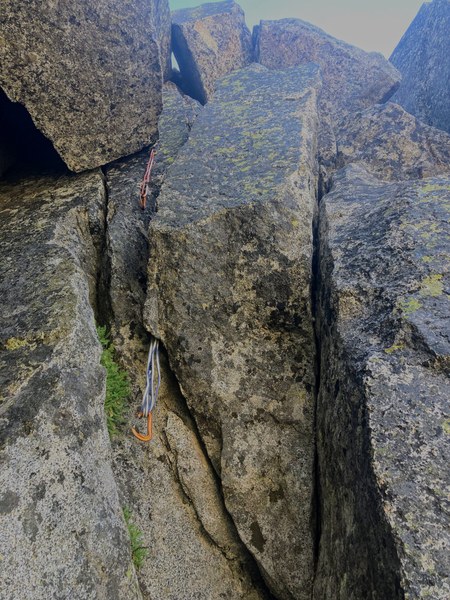
Close up of the crux move. Earlier rope team was kind enough to leave some gear for me.
Continue past crux to the rap station in alcove above.
Pitch 6 - Low fifth
Follow ridge to next rap station
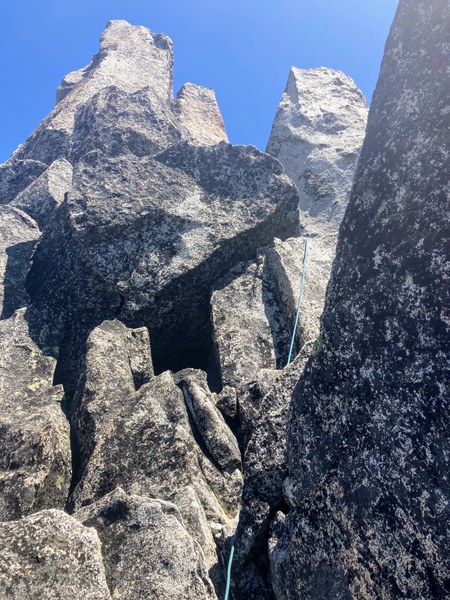
Part of pitch 6
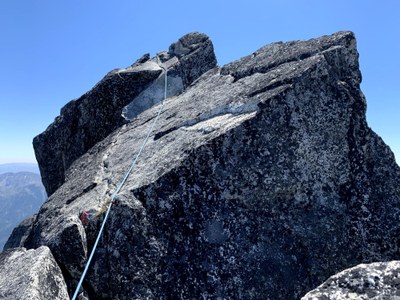
Pitch 6.5 - handline
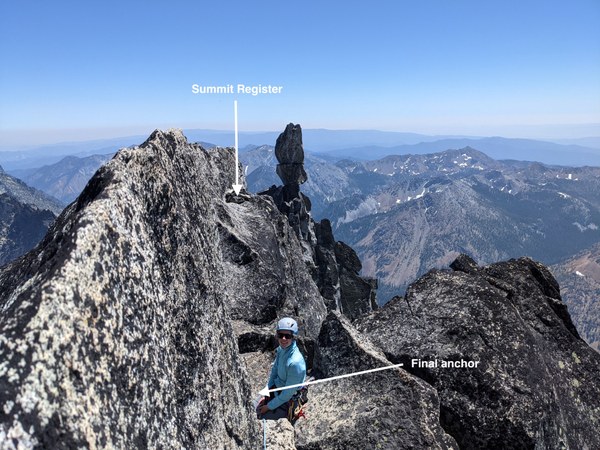
From rap anchor, set a handline across airy slabs to the final anchor near the summit
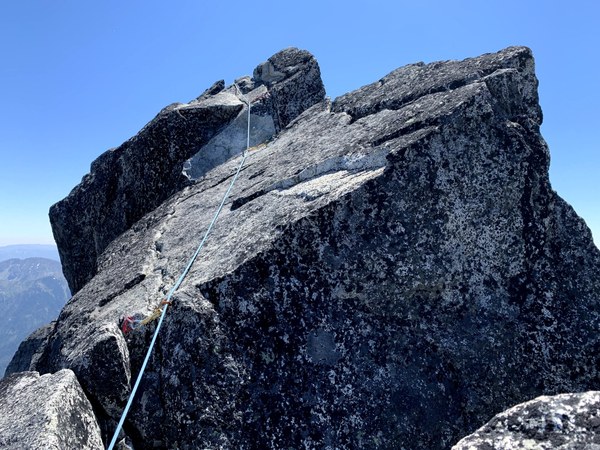
Handline across slabs
Summit
From the final anchor, half our party scrambled the remaining 15’ to the summit unroped, while the other half preferred protection. If you’ve rigged a handline, leave enough rope at this end to belay party members one by one. There’s enough space by this final anchor for 4 people to wait comfortably.
R1
Single rope rappel, from top of P6 to top of P5
R2
Single rope rappel, from top of P5 to base of P5. Scramble back across sandy benches, to the top of the finger where you scoped out the anchor after P3.
R3
This single rope rappel goes down a vertical open book which was not part of the climb. The notch you downclimbed to as part of P3 will be on your right. Stay to the north side of the ridge, and reach a rap station. You can pass this rap station and continue traversing west to a second rap station. Finally, if you flick the rope over a horn, you can pass the second rap station and a 60m rope will just reach the gully which was around the corner from the start of P3. If you intend to use this option, send your strongest scrambler first so they can get off rappel and reach the anchor at the base of P3 to provide support to later rappelers. Otherwise, you can use one of the two anchors to add either a nearly horizontal “rappel” or belay back to the base of P3.
R4
Double rope rappel to the base of the climb.
 Melanie Stam