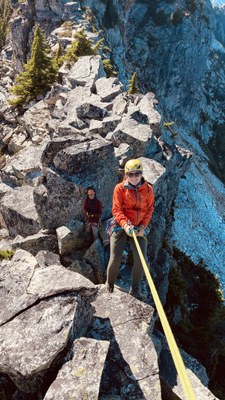
Trip Report
Late Season Ascent of Lundin Peak/West Ridge
Climbing Lundin Peak is a challenging and rewarding endeavor that tests a wide array of mountaineering skills. It presents opportunities to employ alpine techniques, rock climbing abilities, scrambling proficiency, and navigation expertise. The peak's ridgeline offers an excellent introduction to ridge climbing, allowing climbers to hone their skills while attempting a successful round-trip ascent and descent. Those who dare to take on Lundin Peak will be able to push their limits and showcase their full range of mountaineering abilities in this comprehensive alpine adventure.
- Sat, Oct 12, 2024
- Basic Rock Climb - Lundin Peak/West Ridge
- Lundin Peak/West Ridge
- Climbing
- Successful
-

- Road suitable for all vehicles
-
Conditions couldnt have been more perfect. The entire route including the climbers trail were in tip top shape with very little trouble navigating to and from the climb, including the several areas that are considered "no fall zones." (to put it delicately, you REALLY wouldn’t want to fall there.)
Personally this would mark my third attempt at Lundin Peak over the past two months, having been turned around due to bad weather and icy conditions previously. Also and most importantly huge congregations are in order for Olena in completing your basic climbing graduation climb, you were a joy to have on this trip.
Gear:
- Mountaineering Boots or Approach shoes for the hike and climb. Rock shoes are overkill.
- Rope: 60M rope preferred. A shorter rope means shorter pitches.
- Protection: Single Rack to 3. Although theres a couple of great places to put a Metolius 8. Stoppers might be unnecessary as the cracks are solid and take cams nice.
Key Beta:
- GPS track for the Approach
- Honorio Valdes Peak Bagger
- Mountain Project
- Paul Gehlsen Mountaineers Trip Report
The Climb
We arrived at the Alpental parking lot at 6 AM. One of our climbers couldn't make it due to car trouble, leaving us as a party of three. After discussing our options, Jason and I decided to climb as a party of three with someone in the middle and two climbers at the ends. This decision was based on the information that the climb could be done with a 30-meter rope, and Jason had brought a 70-meter rope, making it suitable for the easy-going terrain.
In retrospect, while this approach worked, I feel that it slowed us down. The pitches were shorter, requiring frequent anchor setups, which took additional time. Although the climb was successful, climbing as a party of three with one person in the middle and two at the ends proved to be less efficient than climbing as a pair or with a larger group.
Having done this approach previously, I volunteered to take on the navigation duties. The approach is relatively straightforward; however, there's a section highlighted in green where having an experienced person could expedite the process. The key point is to aim to pass the plane crash on the climber's right, head towards the exposed catwalk area, and proceed in a straight line. Along the way, there are plenty of boot path trails, all of which should lead you to the correct destination.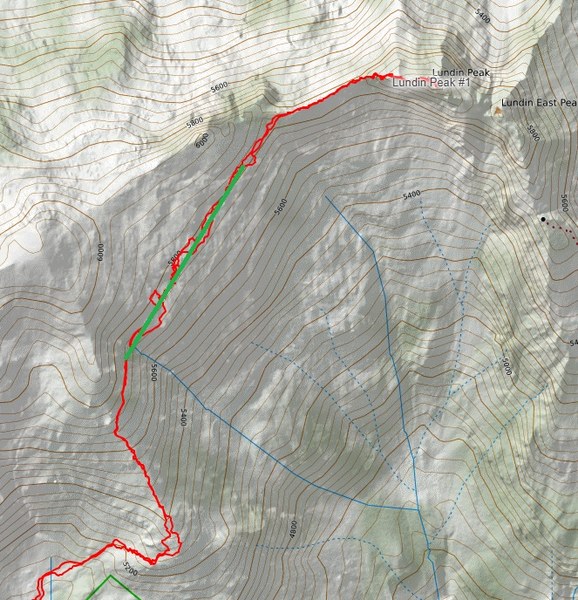
Upon reaching the catwalk area, we discussed our options. At this point, we dropped our packs and geared up for the climb. Going light without heavy packs made the path significantly easier, as there is not much room for packs at the actual base of the climb.
We all agreed to scramble this section instead of dropping below and going under it. We communicated the importance of going slowly, testing each foothold for loose dirt and rocks, and supporting each other. There was no need to rush through this section. Personally, I felt confident scrambling over this section while maintaining three points of contact before making each move. The key was to not rush and stay within our comfort zone.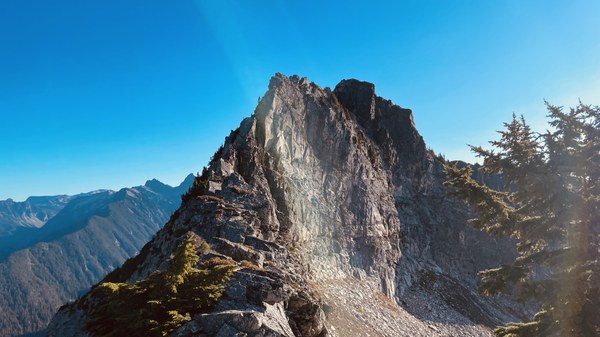
At the base of the climb, we set up a gear anchor to give our basic student practice in setting one up and clipping in. Our leader then set off on the climb. Initially, we had the leader in the middle of the 70-meter rope, with the two followers at either end.
At the top of the first pitch, due to rope drag, we opted to put the leader at one end, myself at the other, with the student using a figure-eight on a bite in the middle. While this worked, it slowed things down as we had to make anchors every 30 meters or so, taking up time.
At the top of the first pitch, a gear anchor was set up.
We knew the next part of the climb involved a scramble around the north side, following a well-worn climbers' trail. From the giant ledge we were on, we opted to set up a hip belay. Our leader set out in that direction. There were two options: moving above or below a tree, as there were boot paths for both, leading to the same place. After approximately 30 meters, our leader set up a gear anchor by slinging a substantial rock flake.
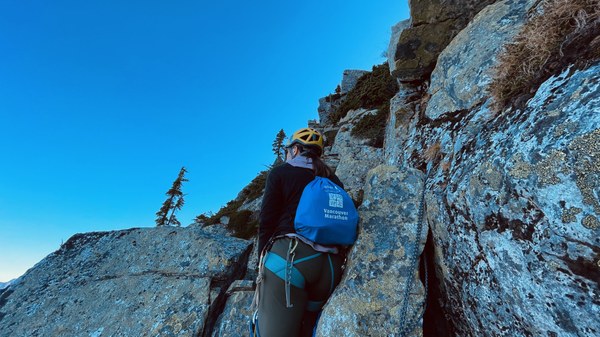
From this point, more traversing around the north side was required. Of all the sections in this area, this felt more consequential. There's a portion about 10 feet from the picture where the only thing separating you from the rock and the open air is a couple of inches in some places, as well as the need for very solid handholds. It's worth noting that the dirt from the boot path can make your feet more slippery, which is why I believe rock shoes are overkill.
Moving up to the next section at the base of the slab pitch, we never found the actual "depression" others have referred to. Instead, we found a great place to set up a three-piece gear anchor on the rock and belayed from there. This next section is where I believe the best climbing is on the entire route. The option we chose going up felt more 5.6'ish in some of the moves. Others indicate aiming for a "notch" in the rock. The path we choose led us to where I have put an arrow, and a gear anchor is setup on a pretty large comfy ledge.
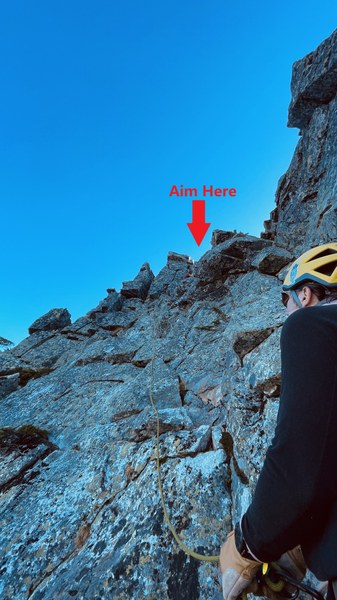
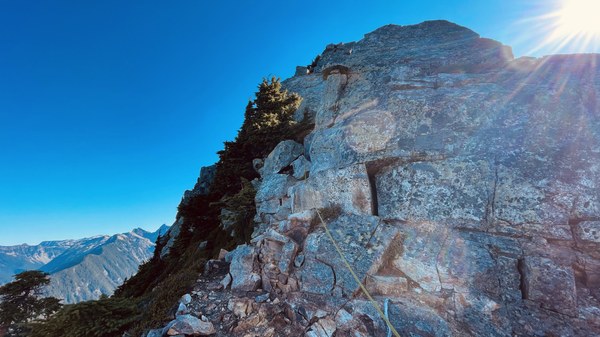
The next section is relatively straightforward. Teams can either unrope or use short ropes while navigating a well-worn climbers' trail to the start of the subsequent section. Although there are a couple of areas with significant exposure, proceed cautiously, moving slowly and ensuring your hand and foot holds are secure. Aside from a few quick moves, this section felt quite secure as we progressed towards the final summit pitch. Most of the movement was just like the catwalk section to get to the actual base of the climb. If you scrambled that section like I expected you did, you shouldnt have any issues with this section. The summit pitch starts with a view of this (Jason leading the charge) with a small tree on a dirt platform.
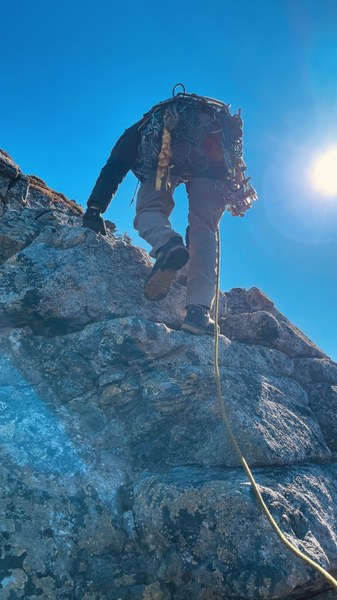
For the summit section, there were several options to consider. We opted for a straightforward approach. Jason set up a handline, securing it at the top and bottom. Both myself and our student ascended using prusik knots.
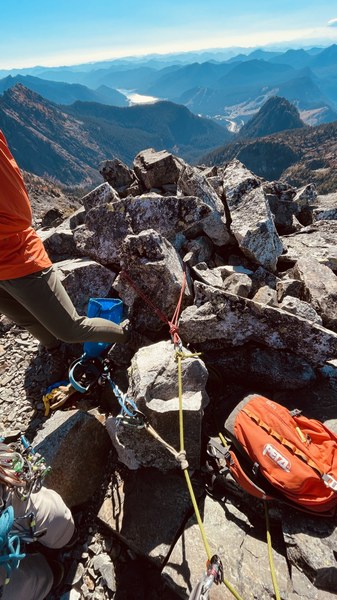
This section felt more like a scramble with two 5.0 moves - one at the very beginning and another in the middle. Honestly, this portion seemed quite short and provided a nice way to top out the climb.
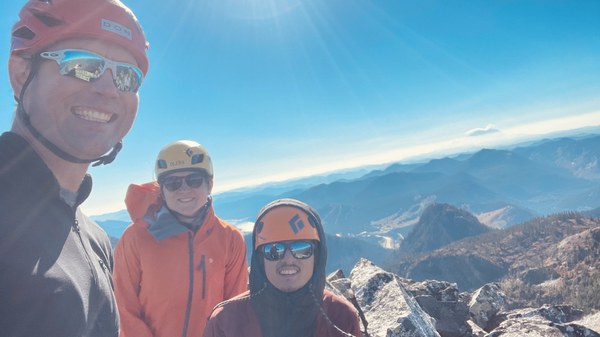
A Quick Summit Stay We had a brief stay at the summit as we were getting blasted by strong winds, so we started our descent. We couldn't find any rappel stations at the top of the West Ridge, so we opted to downclimb using the rope as an extra security measure.
Careful Downclimb With our prior experience, we decided to stay un-roped through this section, carefully making our way back to the rappel station. After a careful inspection of the webbing, we concluded that we should add a couple of pieces as some of it looked pretty worn out.
The Knife Accident I pulled out my knife to remove the old webbing, but it slipped from my hand (oh no!). Luckily, Jason had cat-like reflexes and caught it just before it had its own uncontrolled descent. I thought I had placed it back on my harness, but when we looked to cut some old webbing, we noticed my knife was gone again. After some searching, Jason found it had fallen under some rocks in a tiny hole – he saved it yet again!
Securing the Rappel Not wanting to tempt our luck again, I put the knife on a locker, leaving the old tat in place. We decided to rappel to the base of the slab pitch. Jason added a red cordelette (manufacture date 2023), and I added a blue runner manufacture date 2024).
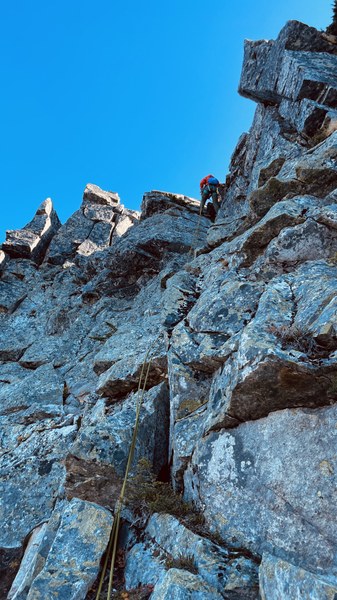
At this point, we all agreed to remain un-roped as we made our way back down. Personally, I was nervous about the section where I had lost my footing earlier. We communicated and agreed to go slowly and stay within arm's reach of each other in case anyone needed extra help. This level of communication put me at ease and made me feel supported throughout the no-fall zone.
As we neared the base of the climb, we encountered a section that all of us felt was pretty sketchy, with an airy move around a big block right above the start of the climb. Jason had his own cordelette, which he generously donated to the mountain. We used it to sling a boulder and rappelled down the final 20 feet to the base of the climb.
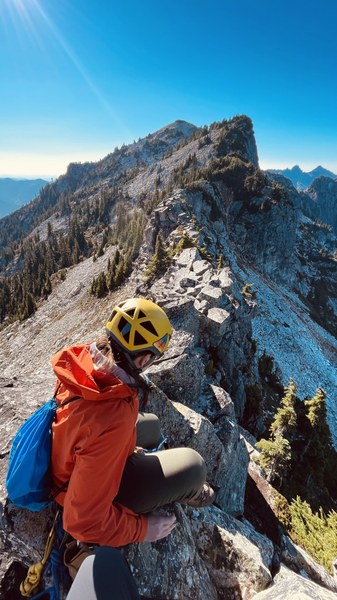
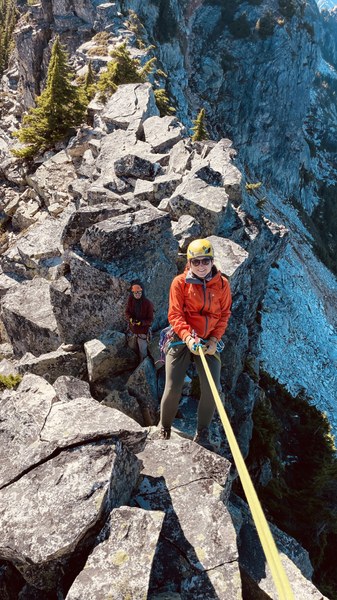
Retracing our steps over the catwalk we had a quick snack, high fived each other and setoff back down the mountain enjoying some final last of the season wild blue berries.
Upon returning to my car I was surprised to learn that while my knife didnt get donated to the mountain along with the two cordelettes, blue runner. My Yellow handle super favorite Neilico Nut Tool was. If you come across it, its yours!
Timeline
- 11:30 Hours Car to Car
- Snow Lake Trailhead -- 6:00AM
- Start of climbing - 10:13AM
- Top of Pitch 3 (Slab Pitch) - 12:00PM
- Summit of Lundin - 12:40PM
- Back to the Base of the Climb - 3:05PM
- Snow Lake Trailhead - 5:22PM
Climbing Videos (Insta360 camera)
- Lundin Peak West Ridge - Catwalk to base of the climb
- Lundin Peak West Ridge - Pitch 1
- Lundin Peak West Ridge - Pitch 2 (Quick)
- Lundin Peak West Ridge - Pitch 3
- Lundin Peak West Ridge - Pitch 4 (Aka Pitch 3 the Slab Pitch)
- Lundin Peak West Ridge - Pitch 5 (Scramble over to Final Pitch)
- Lundin Peak West Ridge - The Summit Pitch
 Don Sarver