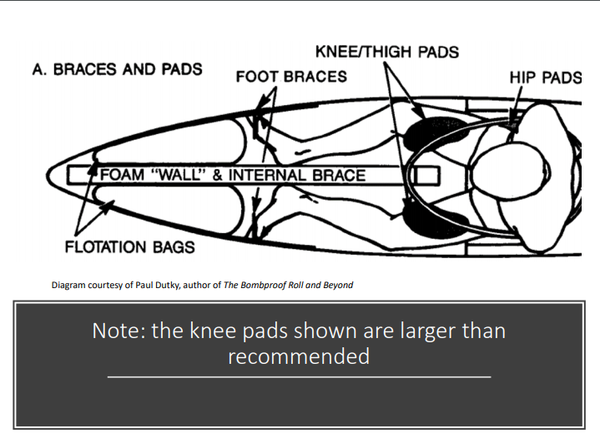
Want to master that “bomb-proof” roll or brace? Want to more effectively edge your kayak? Then you need to make sure your knees are properly secured in your boat to maximize your performance. Wedges can accomplish that. The last thing you want on a brace or roll is for your knee to slip off, and a secure foam wedge allows your knee to flawlessly pull hard and right the boat.
The wedge puts the contact point just above your knee cap where there is firm muscle tissue. The wedge is also much more comfortable than pressing against your fiberglass boat.

Materials needed
- Foam procured from a kayak shop or online: 1” thickness. (you may be able to purchase wedges directly)
- Crosscut saw, sharp bread knife, or band saw
- 60 grit sandpaper
- Acetone
- Mask to protect from organic vapors
- Blue painter's tape
- Contact cement (do not use water-based contact cement)
- Sharpie pen
- Helpful: Stanley Sureform shaver tool
Fitting and taping the wedges
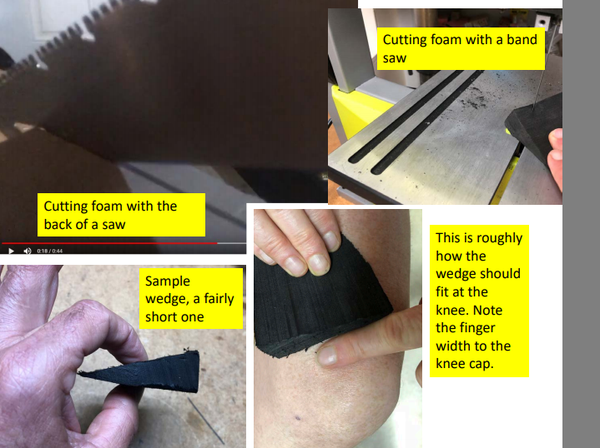
- Sit in your boat, knees splayed out. Use the backside (no teeth) of a crosscut saw, a bread knife, or band saw to cut your foam into wedges. Place them so that the wedge contacts the muscle (your vastus medialis oblique, or VMO) just above the knee cap. You must decide how much taper to have with the wedges. Optionally, if you want to get fancy, you can taper the wedges in the other direction as well, from front to back. The aft end would be thicker to match the angle of your upper leg to the boat.
- Ensure that no foam is over the kneecap; aim for one finger-width between the edge of the foam and the edge of your kneecap.
- Tape the wedges in place once you think you have them positioned properly.
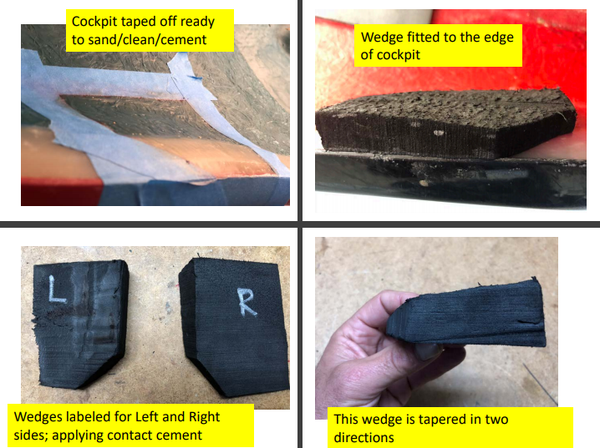
- Apply tape to the boat around the perimeter of the foam (blue painter's tape works well).
Gluing the wedges to the boat
The foam can come all the way to the edge of the cockpit coaming, but should protrude no further. There may be surface contours under the deck that preclude full surface area contact with the wedges; if that is the case, you may need to add the foam in pieces and layers to fill these in, prior to attaching the wedges. To glue the wedges to the boat:
- After fitting and taping, remove the wedges and mark them R and L on the sides that cement to the deck.
- Rough up the boat gluing surface with 60 grit sandpaper and clean with acetone.
- Apply contact cement to your boat and foam wedges according to can instructions.
- Wear a mask that protects against organic vapors.
- Apply three coats of contact cement, then when dry to the correct tackiness stick the wedges in place.
- Line up one edge and carefully stick in place (when it sticks, it’s stuck).
- Immediately remove the tape from your boat.
You can further shape the foam with a Stanley Sureform shaver tool- be sure to purchase the small one for ease of use.


Add a comment
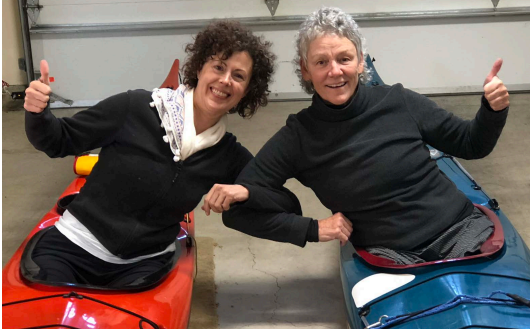
Log in to add comments.Thank you, Charlie, for helping me do this! My kayak has been SO MUCH MORE comfortable since we installed these, and I'm sure when I learn how to roll that it will be a game-changer :)
 Charlie Michel