Cycling the Pacific Coast includes not just the route, things to visit along the way, and lodging options, but also a ton of advice on making a loaded bicycle tour a fun and successful outing. Following is an excerpt from author Bill Thorness’s book on how to load your bike for an outing.
Loading the Bike
Water weighs 8.4 pounds per gallon (4 kilograms per 4 liters). It’s a consideration when packing your panniers (saddlebags) for a long-haul trip. It’s also a consideration when choosing panniers to use on the trip.
Everything that you load onto your bike adds weight, and you have to haul all that weight up hills, lug it on and off the bike at campgrounds, and possibly even unlatch those bags and take them with you into a store when you go shopping. So pannier weight, for most people, is an issue.
The second consideration about water and panniers is more obscure. Choosing panniers that are waterproof means that you’ll haul less water on your bike during those times when you are caught riding in the rain. Panniers that are not at least water-resistant will soak up moisture on a rainy day and become heavier. They will also let the gear inside get wet, and of course everything can take a long time to dry out. Any extra moisture you’re carrying will weigh you down.
Those are just two basic considerations when planning what to carry on your bike and how to pack it all in.
In the appendix in the back of the book, you’ll find a packing list that mentions just a few general theories and considerations, so that you might not have quite as much to box up and ship home on the eighth day into your trip. Below are some additional tips on what and how to pack.
Balance Your Bike Load
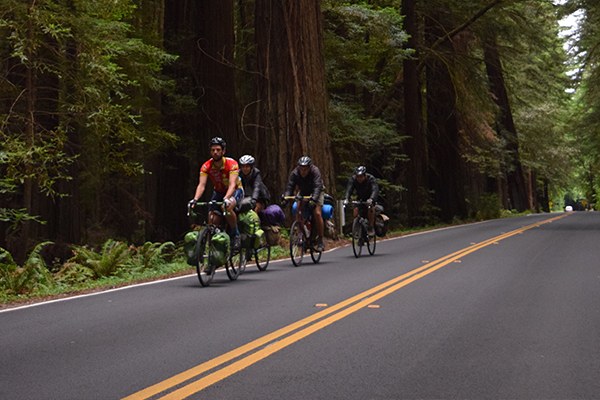
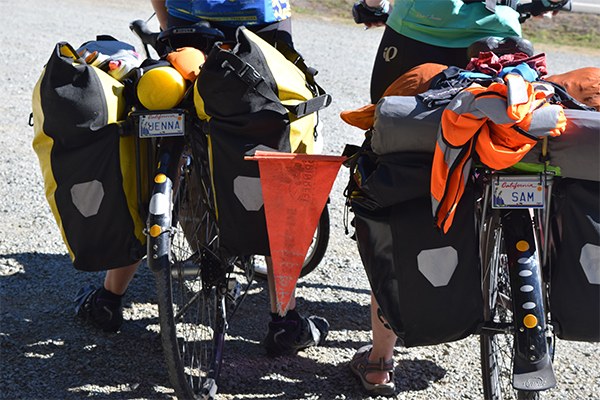
Think carefully about how you pack your heaviest gear and where to put it on your bike to keep the load balanced. I use four panniers: two smaller ones in front and two larger in back. Then I strap my tent to the top of my back rack. I use a small handlebar bag for my camera, lunch, and valuables. This approach distributes the weight, about 35 pounds in my case, as evenly as possible.
Pack Bike Clothes for Three Days
Many people carry three sets of bike shorts and shirts: one set to wear, one clean set, and one set to wash. It’s common to see padded bike shorts lashed to the back rack to dry during the day’s ride. I sweat a lot, so I cannot use clothes more than once without washing them. It is a good idea to carry liquid camp soap to wash things out at campgrounds. Some of the days you are in a town or some evenings you stay in a motel, you can then get everything much cleaner in a laundromat washing machine.
Take Travel-Size Toiletries
Small bottles of shampoo, liquid soap, shaving cream, toothpaste, and sunscreen are lightweight as well as compact, which are two great reasons to use them and just replenish as needed. Yes, they’re more costly and entail more wasteful packaging. Plan to be a low-impact consumer at home, and on tour just accept the trade-off.
Stock Food for Today, Plus Emergencies
It’s common to see cyclists “shopping for tonight’s meal” toward the end of a cycling day. Most route segments in this book suggest provisioning locations near their end. If this is not mentioned, it’s probably because the choices are many or obvious. But what if you miss that provisioning stop or it’s been a long day and you just want to collapse in camp? You need a little something in the panniers to get you by (as well as a camp stove and fuel to cook it with).
Try freeze-dried meals in a pouch. They are lightweight, compact, and flavorful. Just boil water and stir it into the package—simple prep and minimal cleanup. Oregon company Mountain House, which started making MREs (meals ready to eat) for the US Special Forces 50 years ago, offers some excellent meals. I usually keep one or two in my panniers, along with breakfast fixings and a few protein snack bars. Unfortunately, the freeze-dried meals are mostly available from large outdoor retailers like REI, so it’s difficult to replenish them along the route.
 I’ve seen people packing canned food, one-pound bags of rice, bottles of wine, jars of peanut butter, loaves of bread, bags of carrots, boxes or bottles of juice, etc. Remember the issue of pannier weight. My strategy is to buy just enough of these things for tonight’s meal, along with fresh fruit and vegetables, and to carry bulk foods only sparingly.
Pamper Your Bike
Many people don’t do their own bike maintenance when at home; they just occasionally oil the chain and leave the rest for the annual service in the shop. When on a long tour, however, it’s wise to do a little more and plan for emergencies. A bike pump, extra bike tubes, and a patch kit are the basics. If you invest in good new tires before the tour, you can skip carrying extra tires. Chain oil and rags are absolutely required, as is a regimen of cleaning and reoiling the chain every few days. It is wise to carry extra spokes, especially if you have odd-sized rims. It is also wise to bring a multi-tool to tighten and adjust things as needed. Taking a basic maintenance class from your favorite mechanic before hitting the road will mean you can actually use that multi-tool effectively.
If you’re traveling in a group, some items can be shared. Each person might not need a bike pump, for instance; but then again, what if the guy with the pump is 10 miles ahead when you have a flat?
A comprehensive list of gear to bring for maintaining and repairing your bike while on tour, contributed to the book by Joshua Tack of the Adventure Cycling Association, can be found in the appendix at the back of the book.
Add Something Special
On a long climb in Northern California, I met a cyclist going north who yelled across the road, “Have you seen a monkey?” Smiling, I hollered back, “A real one? No!” But it wasn’t a joke question. Renna had lost her mascot, a small stuffed sock monkey, and it was important to her, so she was retracing her route in order to find it. I pedaled on, scanning the roadside, and did indeed find “Martín” staring up at me, arms outstretched, equally alarmed at being parted from human companions. I scooped it up, pedaled on until I came upon Renna’s riding partner, Sam, and then waited until she arrived back so I could triumphantly press the valuable talisman into her hands and celebrate Martín’s return. The next day, meeting up in camp, she presented me with my own mascot, a cheeky yellow rubber duck, who’s been peeking out of one of my panniers now for many miles.
A mascot will cheer you up on a rainy or difficult day, give you something fun to place in a photo or take selfies with—even become the spokesmascot on your trip blog.
Other special items I’ve admired or taken on trips: an e-reader loaded with books, a small massage tool for sore muscles, pop-up camp lights, a string of battery-powered twinkly lights, a flag of your nation to fly on the bike, special food from home (like unusual hard candies) to share with fellow travelers, a beanie umbrella strapped onto a helmet, a boom box to play dance music each time you complete a map segment (coming from that same duo with the mascot Martín—they were fun!). You never know when you might want to start a little roadside dance party, right? I joined in, and encourage you to do likewise.
 Mountaineers Books
