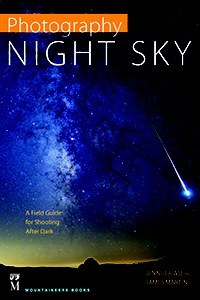
Look, up in the sky! The Perseids Meteor Shower is coming to a night sky near you. If you are feeling ambitious, try to catch a meteor -- on camera! Below are tips excerpted from Jennifer Wu and James Martin's Photography Night Sky.
Meteors
A meteor-hunting photographer depends on an equal measure of luck and planning. The best time to capture meteor pictures is during a meteor shower. During the height of the largest showers, meteors may streak across the sky a couple of times a minute. With luck, a few larger ones may paint a wide arc.
Meteor showers emanate from particular constellations. Set up with the best foreground for that direction, frame the image to include the constellation with the surrounding area, and program your intervalometer to shoot frame after frame for several hours.
If you live in the Northern Hemisphere, good news: more major meteor showers appear in the north than the south. But not all showers are created equal.
The Quadrantids in January produce over one hundred meteors an hour, but they tend to be faint. April often brings brighter meteors but in small numbers. Around August 12 and 13, the Leonids yield somewhat fewer meteors, but they are easier to see. The meteors appear from the Perseus constellation, so look toward the northeast. The Taurids in November produce only a few meteors per hour, but some are real fireballs formed by unusually large meteoroids. In the north, the Leonids put on a good display around November 17th. While you can expect more meteors to appear in the direction of the meteor shower’s namesake constellation, they can appear anywhere in the sky.
Look for a meteor shower that occurs when the moon is not full. The darkness of the new moon allows fainter meteoroids to be visible and brighter ones to be spectacular, but a half-moon supplying some light on the landscape also works. Photographing the shower away from city lights will produce a darker sky and stronger meteor light in the image. City lights in the distance endow the scene with a warm, sunset-like rim light along the horizon.
Approach meteor photography as you would stars as points of light. The techniques and settings are identical. At the end of the shoot, you’ll have hundreds of images to review, but with luck you will have caught a well-placed meteor in your photographic net. The shorter 15- to 30-second exposures work best for allowing the meteor to be bright in the image. Using
an exposure of a few minutes will result in a dim meteor in the frame—it may not even show up at all.
Increase your chances of photographing a meteor, especially a really big one, by taking shots continuously. Use the intervalometer and set the interval between frames for 2 seconds. Keep all the other settings on the intervalometer
set to 0 and press the start button. Press the stop button when you are done.
Be sure to have a fully charged battery and plenty of extra memory cards if you are going to be out all night. If you have two cameras, set them up in different directions. You can tell plane trails from meteors as plane trails are white or red with abrupt starting and ending points. A meteor often has a green color at the start with a white tip that tapers out.
 Webster Chang