The weather is warming and many climbers are moving from gyms to outdoor rock. Most will be working on sport climbs with bolted anchors. Here's a refresher on the correct way to clip into bolts excerpted from Chapter 6, "Sport Climbing and Bolted Anchors" in the new book, Rock Climbing Anchors, 2nd Ed., by Topher Donahue and Craig Luebben.
ROCK CLIMBING ANCHORS: BOLTED ROUTES
Smith Rock, Oregon, lies in a beautiful gorge cut by the Crooked River. During the birth of sport climbing in America during the mid- to late 1980s, the highly featured volcanic rock was bolted to create a wealth of cutting-edge sport routes. Many of the country’s first 5.13 and 5.14 routes were climbed here, partly because Smith Rock was one of the first places where bolts proliferated.
Not all the routes at Smith are hard. You can find 5.7s a few dozen feet from 5.14s, with an abundance of everything in between. Some of the early bolted routes are spicy—the bolts are spaced a little farther apart than on most modern sport routes. Generally, though, it’s like any sport climbing area: with preplaced bolts and little gear to carry, you can focus on the climbing. Because of the soft rock, some of the bolts are glue-ins, while others are standard mechanical bolts.
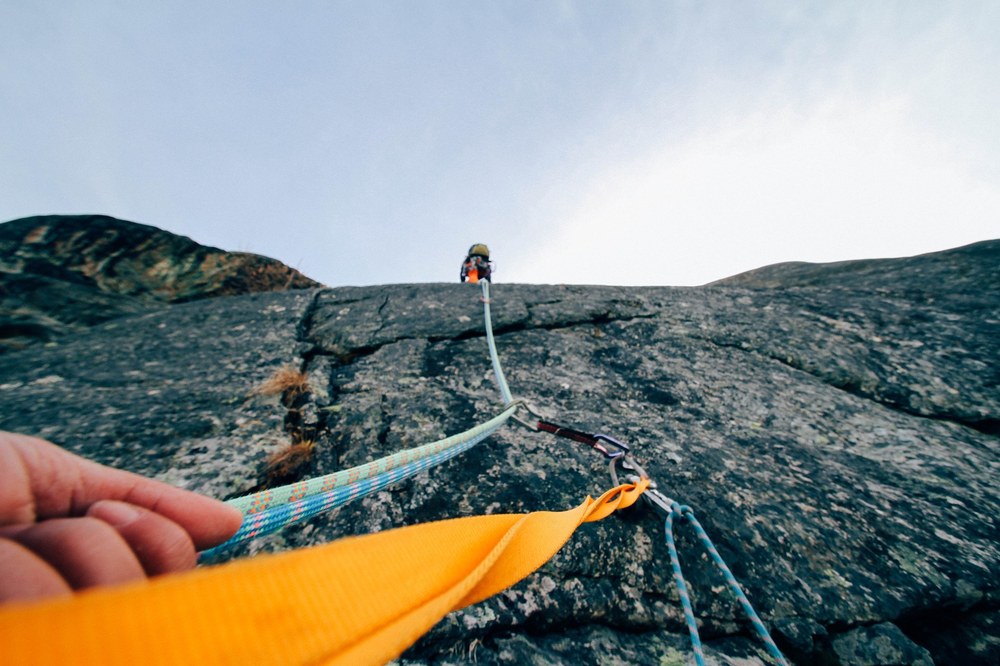
You welcome the sunshine that warms the rock as you check your knot and harness, the belayer’s harness and belay device, and the stopper knot in the end of the rope. You make sure that you have enough quickdraws, all clipped in the same direction, with the rope carabiner (the one fixed in the quickdraw, often with a bent gate) hanging on the bottom. You also carry a couple slings and extra carabiners for attaching yourself to the top anchors, so you can rig the rope to lower at the top. Once you’re certain that everything is in line, you start up the pitch, enjoying the feel of the rock on your fingertips.
The task of setting anchors and protection is simplified when sport climbing because the bolted anchors are already in place, waiting to be clipped. This chapter tells you what to carry and gives a few considerations for clipping bolts, such as:
- how to align the quickdraws,
- avoid dangerous carabiner orientations,
- rig anchors for lowering and top-roping,
- set up bolted belay stations for multipitch routes.
CLIPPING BOLTS
Ideally, the rope runs as straight as possible as you lead a route, because each bend in the rope adds drag. If the bolts lie in a fairly straight line, short quickdraws work fine. If the bolts wander or the route climbs overhanging rock, longer quickdraws help the rope run clean. If a bolt is way off to the side or far under a roof, a shoulder-length sling might provide enough extension to keep the rope running straight.
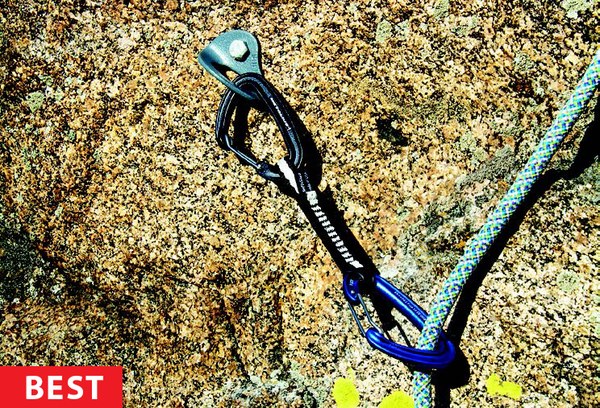
If the pitch traverses above the bolt, face the
quickdraw so both gates open away from the
direction of travel.
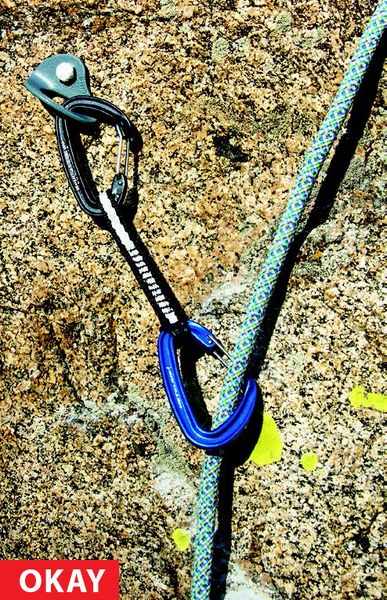
If the carabiner gate faces the direction
of travel, it has a greater chance of unclipping
during a fall. However, accidental unclipping is
extremely rare. If other bolts provide backup,
clipping this way is acceptable.
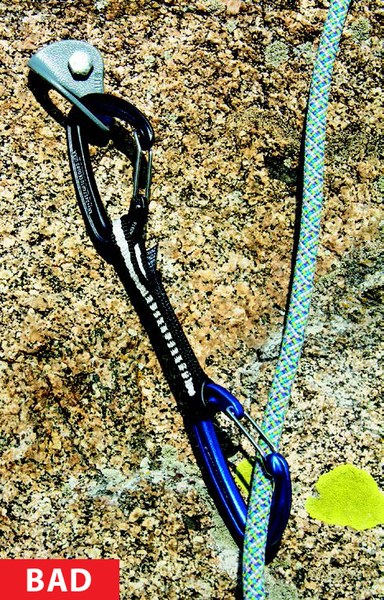
Avoid back-clipping the quickdraw, where
The rope passes through the carabiner
from the front and emerges on the rock side.
A proper clip has the rope running from behind
the biner, out the front, and to the climber
without twisting the quickdraw.
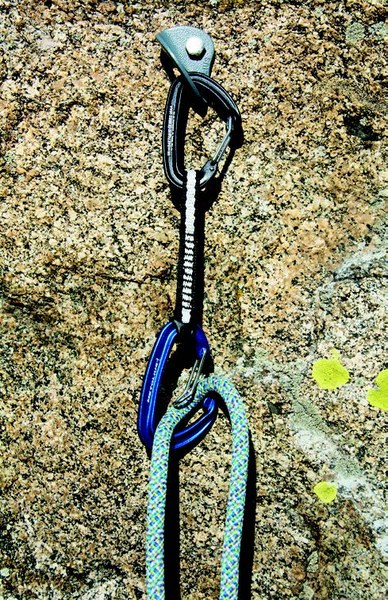
Back-clipping increases the chance that the rope will
accidentally unclip if you fall.
RIGGING BOLTED ANCHORS FOR LOWERING AND TOP-ROPING
At busy climbing areas, it’s often best to lower back to the ground through your own carabiners to save wear on the fixed rings. The last climber down, however, will usually lower from the fixed hardware.The rope should pass through steel rings or chain links attached to at least two bolts. Most bolt hangers are sharp on the inside, and they are not intended for passing the rope directly through. Large, thick, rounded Metolius rap hangers are the exception. Sometimes the last climber down rappels rather than lowering, to save wear on the fixed rings and the rope. Before the climber begins climbing, he and the belayer should discuss whether the climber is going to lower or rappel from the top. Do not lower with the rope running through webbing!
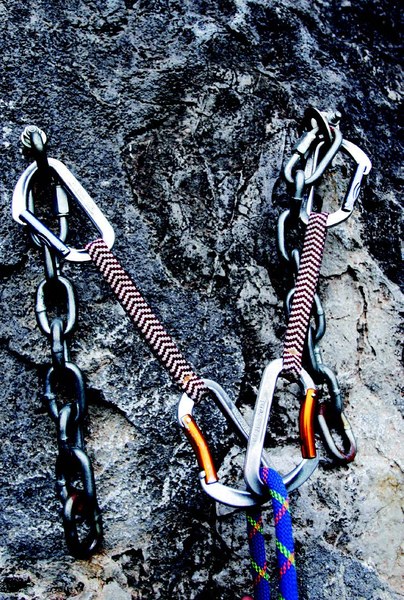
This is a standard setup for lowering back to
the ground and top-roping off a bolted anchor.
Utilizing one quickdraw per bolt, face the
carabiner gates out so the carabiners don’t
interfere with each other’s gates.
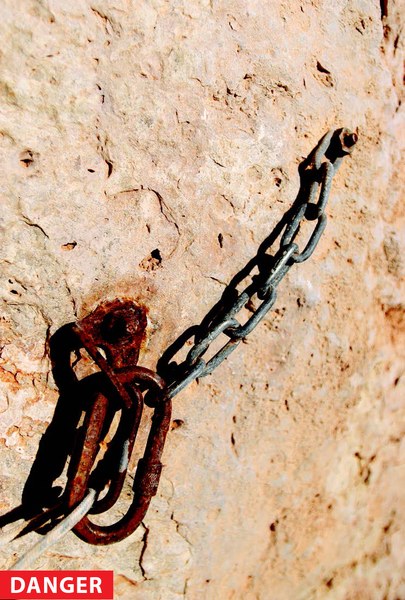
You can’t be mindless about your anchors, even
when sport climbing. The leader downclimbed
this pitch rather than being lowered from these
rusty seaside bolts. The most dangerous forms
of corrosion are invisible.
MULTIPITCH BOLTED ANCHORS
On multipitch sport routes, you often see climbers with bizarre rigging at the belays. Using a simple pre-equalized setup minimizes the gear required and increases the security of the rigging. If the positioning of the belay bolts is consistent from pitch to pitch, you can keep the sling tied and just clip it into each new set of anchors.
When anchors are built from modern, half-inch stainless-steel bolts, equalizing the bolts is not necessary. On hanging belays, this is an advantage because the belayer can stay suspended below one bolt, taking advantage of a foot ledge or staying out of the leader’s way. A single power point in this scenario becomes awkward and inefficient.
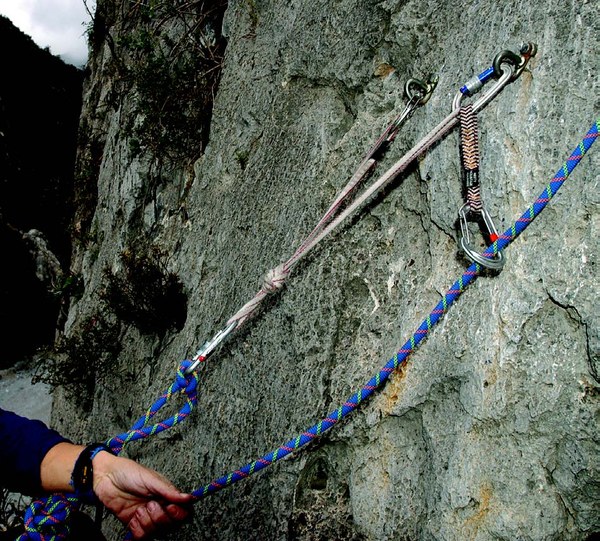
Pre-equalizing a double-length sling
to build an anchor is simple, fast, secure, and
uses little gear. Here, the leader clipped on
of the bolts as a first piece of protection.
* * * * *
SPORT CLIMBING RACK
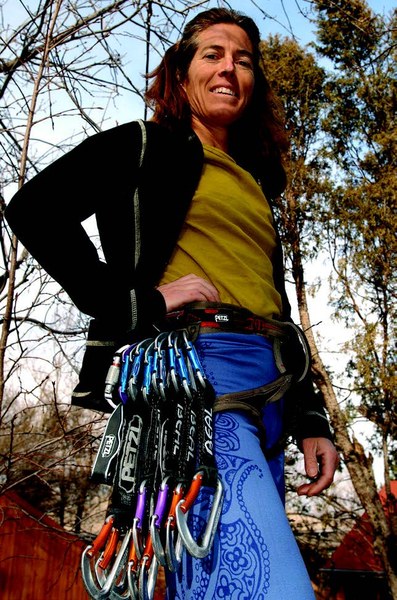
For single-pitch sport routes, you need only enough quickdraws to clip all the bolts, plus two for the top anchors and one or two spares in case you drop one. Many climbers add a couple slings with locking carabiners for the transition from climbing to lowering. A typical sport climbing rack might include the following:
- ten to fifteen quickdraws
- two shoulder-length slings
- two to three extra carabiners
- two to three locking carabiners
- one belay device
You’ll need some extra gear for arranging the belay anchors on multipitch sport routes. Add the following:
- two double-length slings for rigging belay stations
- two standard carabiners
- four locking carabiners
- two belay/rappel devices with locking carabiners
If the belay stations have more than two bolts, or if you plan to set gear to back up the belays, substitute a cordelette for the double slings. It’s also a good idea to carry a small knife on multipitch routes in case you have a stuck rope or need to cut cord. Multipitch sport climbs can be quite adventurous. Carrying a light set of chocks and two or three cams allows the climbers to be less at the mercy of the bolting job; a piece of trad gear can eliminate a scary runout, serve as backup to a dubious-looking bolt, and save the day for rigging rappel anchors in case things don’t go as planned—such as getting off-route on the descent or when a damaged rope forces shorter rappels
* * * * *
DANGEROUS CARABINER ORIENTATIONS
Carabiners are strongest when loaded along their spine with the gate closed. If the gate gets pushed open, the carabiner loses about half its strength. The UIAA certification for carabiners requires open-gate and cross-loaded strength of at least 7 kN (over 1,574 pounds) of force—plenty strong enough to hold the typical sport climbing fall. If the carabiner gets leveraged over an edge, however, it can break from as little as 2.5 kN (560 pounds) of force—even a small climber generates this much force in a typical climbing fall. Pay attention to avoid dangerous carabiner orientations. Beware of excessive wear on fixed quickdraws. The rope-end carabiner can wear to a razor-sharp edge and cut a rope.
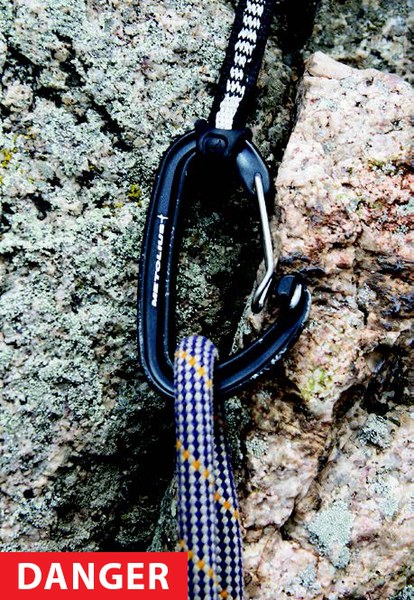
Avoid any orientation that allows the rock to push
the carabiner gate open. If the gate opens during a
fall, the carabiner can lose around two-thirds or more
of its strength. Carabiners are marked with their
full strength, gate-open strength, and cross-loaded
strength.
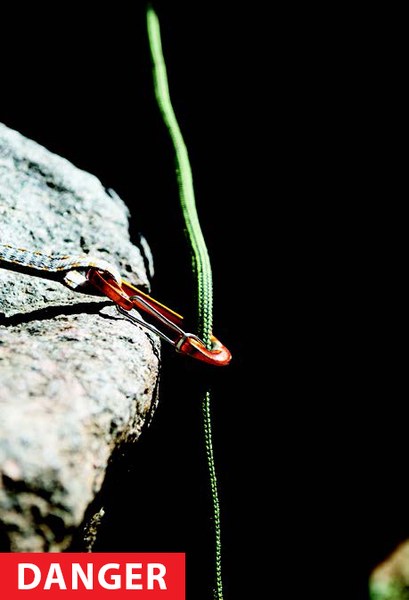
A carabiner loaded over an edge could break in an
average leader fall. A longer quickdraw would avoid
this problem.
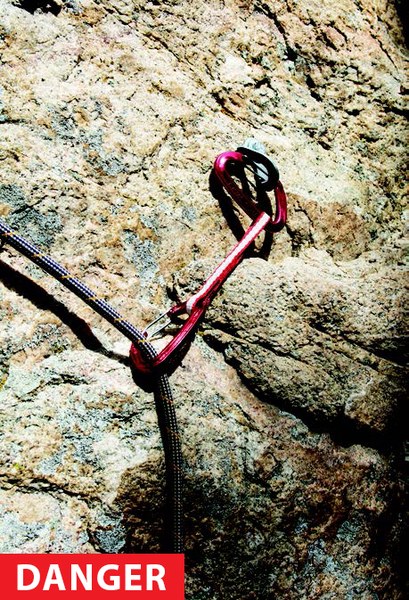
This cross-loaded carabiner is sacrificing
much of its strength. Pay special attention to make
sure that carabiners get loaded along their spines.
* * * * *
With the exception of the header image, all photos by Topher Donahue and Craig Luebben. For more thoughtful instruction informed by decades of hard-earned knowledge, be sure to pick up a copy of Rock Climbing Anchors, 2nd Edition.
 Mountaineers Books
